> ## Documentation Index
> Fetch the complete documentation index at: https://studio.assembly.com/docs/llms.txt
> Use this file to discover all available pages before exploring further.
# Invoicing
> Create, manage, and send invoices to your clients and companies.
 ## Using the Invoices page
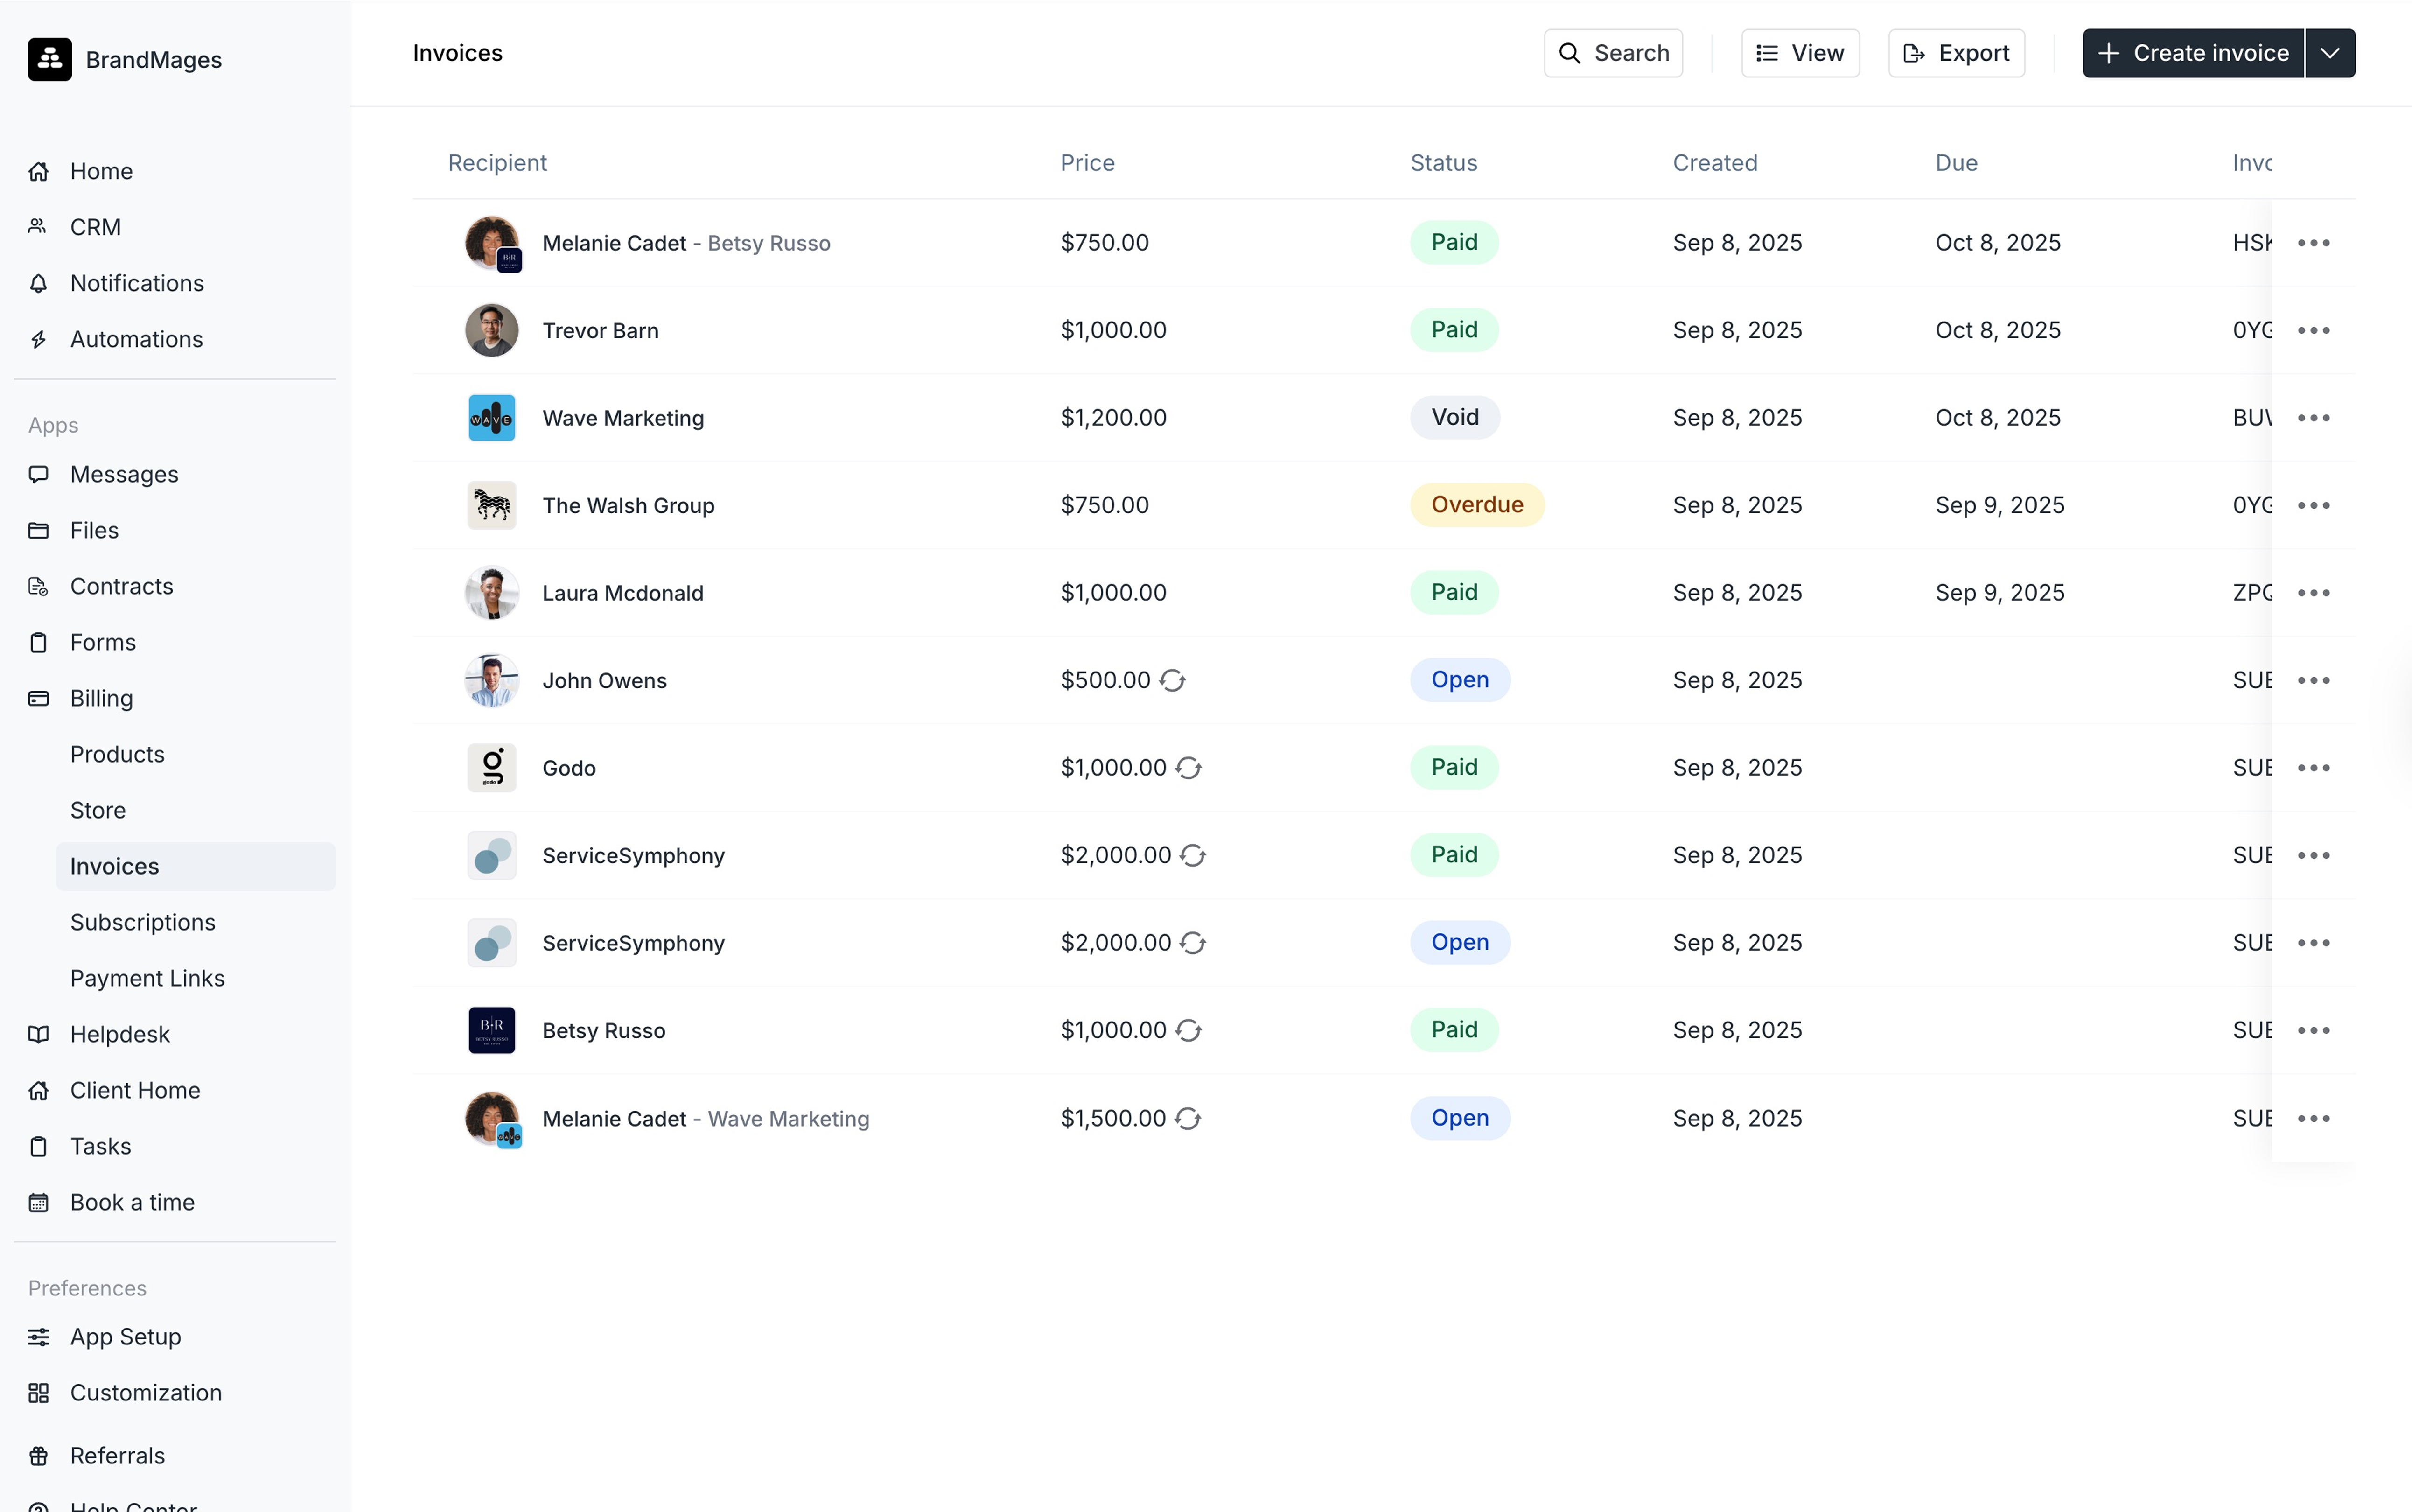
On the **Payments > Invoices** page, you can see the status and any other associated information for all invoices. You can create a new invoice by clicking **+ Create invoice** in the top-right of the **Invoices** page. You can export invoices by clicking on the export icon in the top-right of the **Invoices** page.
## Invoice templates
When you click on the dropdown to the right of **+ Create invoice**, you'll see a menu where you can select existing **invoice templates** and an option to create new ones. Invoice templates are useful if you find yourself creating invoices with the same information over and over.
## Invoice statuses
| Status | Definition |
| ---------- | ------------------------------------------------------------------------------------------------------------------------------------------------------------------------------------------------------------------------------------------------------ |
| Open | The invoice was created, but has not been paid. |
| Paid | The invoice has been paid. |
| Void | The invoice has been voided. |
| Processing | The bank is processing the payment. If the payment fails, the status will return to **Open**. If the payment is successful, the status will change to **Paid**. This generally applies to ACH payments as they can take 5-7 business days to finalize. |
## Create a new invoice
Follow these steps to create an invoice. At any time, toggle the **Preview** button to see how this invoice will appear to clients. You can preview the email notification, checkout page, and invoice PDF.
1. Navigate to **Payments** > **Invoices** on the navbar and click on **+ Create invoice**.
2. Select an individual client or company. If you select a company, any client associated with the company can view and pay the invoice.
When selecting a client to send an invoice to, clients associated with companies will display the company name below the client name. Clients with multiple companies will appear once for each company. Select the clients based on which company should receive the invoice.
3. Optionally select an address for the client or company. If an address has not been added yet, you can create one from the Company Details or Client Details page.
4. Add one or more line items, each with a price and quantity.
5. Optionally add taxes.
6. Specify if you want to auto-charge or notify the client to pay manually.
1. If you select **Automatically Charge Payment Method**, you must add a payment method for the client if there isn't one on file yet. Automatic charges can be applied to both credit card and ACH payments.
2. If you select **Notify Client to Pay Manually**, the client will receive an email notification that notifies them about the invoice. If you select this option, you also have to set a due date.
7. Optionally add a memo.
8. Optionally add attachments.
9. In the **Advanced settings** section, you can:
1. Specify if you want to allow credit card payments and/or ACH payments.
2. Specify if you or your client pays for payment processing fees
## Adding a service to an invoice
1. Navigate to **Payments** > **Invoices** on the navbar and click on **+ Create invoice**.
2. Select an individual client or company. If you select a company, any client associated with the company can view and pay the invoice.
3. Add one or more line items.
4. In the Description input field, it will say **Find or add an item**
1. To add a service that already exists, please follow these steps:
1. Search for and select the service from the list.
2. After selecting the service, if the service has multiple prices, select the price from the **Price** dropdown.
2. To create a new service, please follow these steps:
1. Enter the name of the new service.
2. Add the price of the new item.
3. Check the **Add to services** box and select **Save**.
5. Add the quantity.
6. Optionally add taxes.
7. Specify if you want to auto-charge or notify the client to pay manually.
8. If you select **Automatically Charge Payment Method**, you must add a payment method for the client if there isn't one on file yet. Automatic charges can be applied to both credit card and ACH payments.
9. If you select **Notify Client to Pay Manually**, the client will receive an email notification that notifies them about the invoice. If you select this option, you also have to set a due date.
10. Optionally add a memo.
11. Optionally add attachments.
12. In the **Advanced settings** section, you can:
1. Specify if you want to allow credit card payments and/or ACH payments.
2. Specify if you or your client pays for payment processing fees
13. Once you've finished setting up the invoice, click **Create invoice**.
## Using the Invoices page
On the **Payments > Invoices** page, you can see the status and any other associated information for all invoices. You can create a new invoice by clicking **+ Create invoice** in the top-right of the **Invoices** page. You can export invoices by clicking on the export icon in the top-right of the **Invoices** page.
## Invoice templates
When you click on the dropdown to the right of **+ Create invoice**, you'll see a menu where you can select existing **invoice templates** and an option to create new ones. Invoice templates are useful if you find yourself creating invoices with the same information over and over.
## Invoice statuses
| Status | Definition |
| ---------- | ------------------------------------------------------------------------------------------------------------------------------------------------------------------------------------------------------------------------------------------------------ |
| Open | The invoice was created, but has not been paid. |
| Paid | The invoice has been paid. |
| Void | The invoice has been voided. |
| Processing | The bank is processing the payment. If the payment fails, the status will return to **Open**. If the payment is successful, the status will change to **Paid**. This generally applies to ACH payments as they can take 5-7 business days to finalize. |
## Create a new invoice
Follow these steps to create an invoice. At any time, toggle the **Preview** button to see how this invoice will appear to clients. You can preview the email notification, checkout page, and invoice PDF.
1. Navigate to **Payments** > **Invoices** on the navbar and click on **+ Create invoice**.
2. Select an individual client or company. If you select a company, any client associated with the company can view and pay the invoice.
When selecting a client to send an invoice to, clients associated with companies will display the company name below the client name. Clients with multiple companies will appear once for each company. Select the clients based on which company should receive the invoice.
3. Optionally select an address for the client or company. If an address has not been added yet, you can create one from the Company Details or Client Details page.
4. Add one or more line items, each with a price and quantity.
5. Optionally add taxes.
6. Specify if you want to auto-charge or notify the client to pay manually.
1. If you select **Automatically Charge Payment Method**, you must add a payment method for the client if there isn't one on file yet. Automatic charges can be applied to both credit card and ACH payments.
2. If you select **Notify Client to Pay Manually**, the client will receive an email notification that notifies them about the invoice. If you select this option, you also have to set a due date.
7. Optionally add a memo.
8. Optionally add attachments.
9. In the **Advanced settings** section, you can:
1. Specify if you want to allow credit card payments and/or ACH payments.
2. Specify if you or your client pays for payment processing fees
## Adding a service to an invoice
1. Navigate to **Payments** > **Invoices** on the navbar and click on **+ Create invoice**.
2. Select an individual client or company. If you select a company, any client associated with the company can view and pay the invoice.
3. Add one or more line items.
4. In the Description input field, it will say **Find or add an item**
1. To add a service that already exists, please follow these steps:
1. Search for and select the service from the list.
2. After selecting the service, if the service has multiple prices, select the price from the **Price** dropdown.
2. To create a new service, please follow these steps:
1. Enter the name of the new service.
2. Add the price of the new item.
3. Check the **Add to services** box and select **Save**.
5. Add the quantity.
6. Optionally add taxes.
7. Specify if you want to auto-charge or notify the client to pay manually.
8. If you select **Automatically Charge Payment Method**, you must add a payment method for the client if there isn't one on file yet. Automatic charges can be applied to both credit card and ACH payments.
9. If you select **Notify Client to Pay Manually**, the client will receive an email notification that notifies them about the invoice. If you select this option, you also have to set a due date.
10. Optionally add a memo.
11. Optionally add attachments.
12. In the **Advanced settings** section, you can:
1. Specify if you want to allow credit card payments and/or ACH payments.
2. Specify if you or your client pays for payment processing fees
13. Once you've finished setting up the invoice, click **Create invoice**.