> ## Documentation Index
> Fetch the complete documentation index at: https://studio.assembly.com/docs/llms.txt
> Use this file to discover all available pages before exploring further.
# Client billing experience
> How clients are notified about, pay, and manage payment methods for invoices and subscriptions in your portal.
## Client experience
### Email notifications
Clients will automatically receive email notifications when a new invoice is due for payment or when there is a new subscription request. Email notifications will contain links to checkout in your portal.
### Portal notifications
When invoices are open, clients will see a numbered notification on their sidebar beside **Payments** that corresponds to the number of open invoices.
### Checkout
Clients can check out directly from your portal on desktop and mobile. They will have the option to add a new payment method or select an existing payment method.
## Client payment methods
### Adding a payment method on behalf of a client
You can add a payment method for a client as long as it is a credit card. ACH payments are primarily configured by the client themselves, due to the fact that they must log in with their online bank credentials using Stripe OAuth or verify their micro-deposits in their bank account from Stripe.
There are two places in the product where adding payment methods is possible:
**Client Details (Existing Clients):**
1. From the **Clients** page, click on the client you wish to add the payment method for and their details will appear to the right.
2. Next, expand **Payment Information**. If there are no payment methods added for the client, you will see the option to add a new payment method. If they already have a payment method connected, you will see an **Edit** button.
3. Clicking the **Edit** button will display the current payment methods for the client, as well as an option to add a payment method.
4. Clicking **Add a new payment method** will prompt you to select the payment method type.
5. Select **Connect a credit card**.
6. Enter the client's credit card details when prompted and click **Save**. The payment method has now been added to the client's account.
7. Note: If you are adding an additional payment method, please make sure **Set as primary payment method** is checked or unchecked based on your preference.
**Creating an Invoice or Subscription:**
1. When creating an invoice or subscription, you have the option to automatically charge a payment method. If there are no payment methods added for the client, you will see the option to add a new payment method. If they already have a payment method connected, you will see an **Edit** button.
2. Clicking the **Edit** button will display the current payment methods for the client, as well as an option to add a payment method.
3. Clicking **Add a new payment method** will prompt you to select the payment method type.
4. Select **Connect a credit card**.
5. Enter the client's credit card details when prompted and click **Save**. The payment method has now been added to the client's account.
6. Note: If you are adding an additional payment method, please make sure **Set as primary payment method** is checked or unchecked based on your preference. Adding a payment method for a client that has not accepted their invitation is not supported.
### ACH Payments
When a client goes to pay their invoice they will have the option to connect a bank account for ACH payments in addition to adding a credit card, Apple pay or Google pay.
There are 2 ways for your clients to connect a bank account to use for ACH payments:
**Connect a bank using Stripe OAuth (Recommended)**
Stripe OAuth is the simplest way to connect a bank account. Stripe will accept the client's credentials they use to log into their online bank account and verify the connected account immediately.
Clients can only add their bank using Stripe OAuth when paying their invoice. They cannot use Stripe OAuth to add their bank through the payment method page in their settings. However, they can manually add their bank in the payment method page in their settings.
**Connect a bank manually**
If a client's bank does not support Stripe OAuth or they would rather verify their account manually, they will need to enter their name, account number, and routing number.
Once they've entered their information, they will be taken to their **Settings > Payment methods** page. This is where they will go to verify their account using microdeposit amounts sent from Stripe. It will take 2-4 business days for the microdeposits to appear on the client's statement.
The microdeposits will have `__ACCTVERIFY__` in the statement descriptor.
Once they've clicked **Verify** they will be shown the above pop-up. Stripe will deposit 2 amounts less than \$1 USD and the client will need to enter the exact amount of the microdeposits.
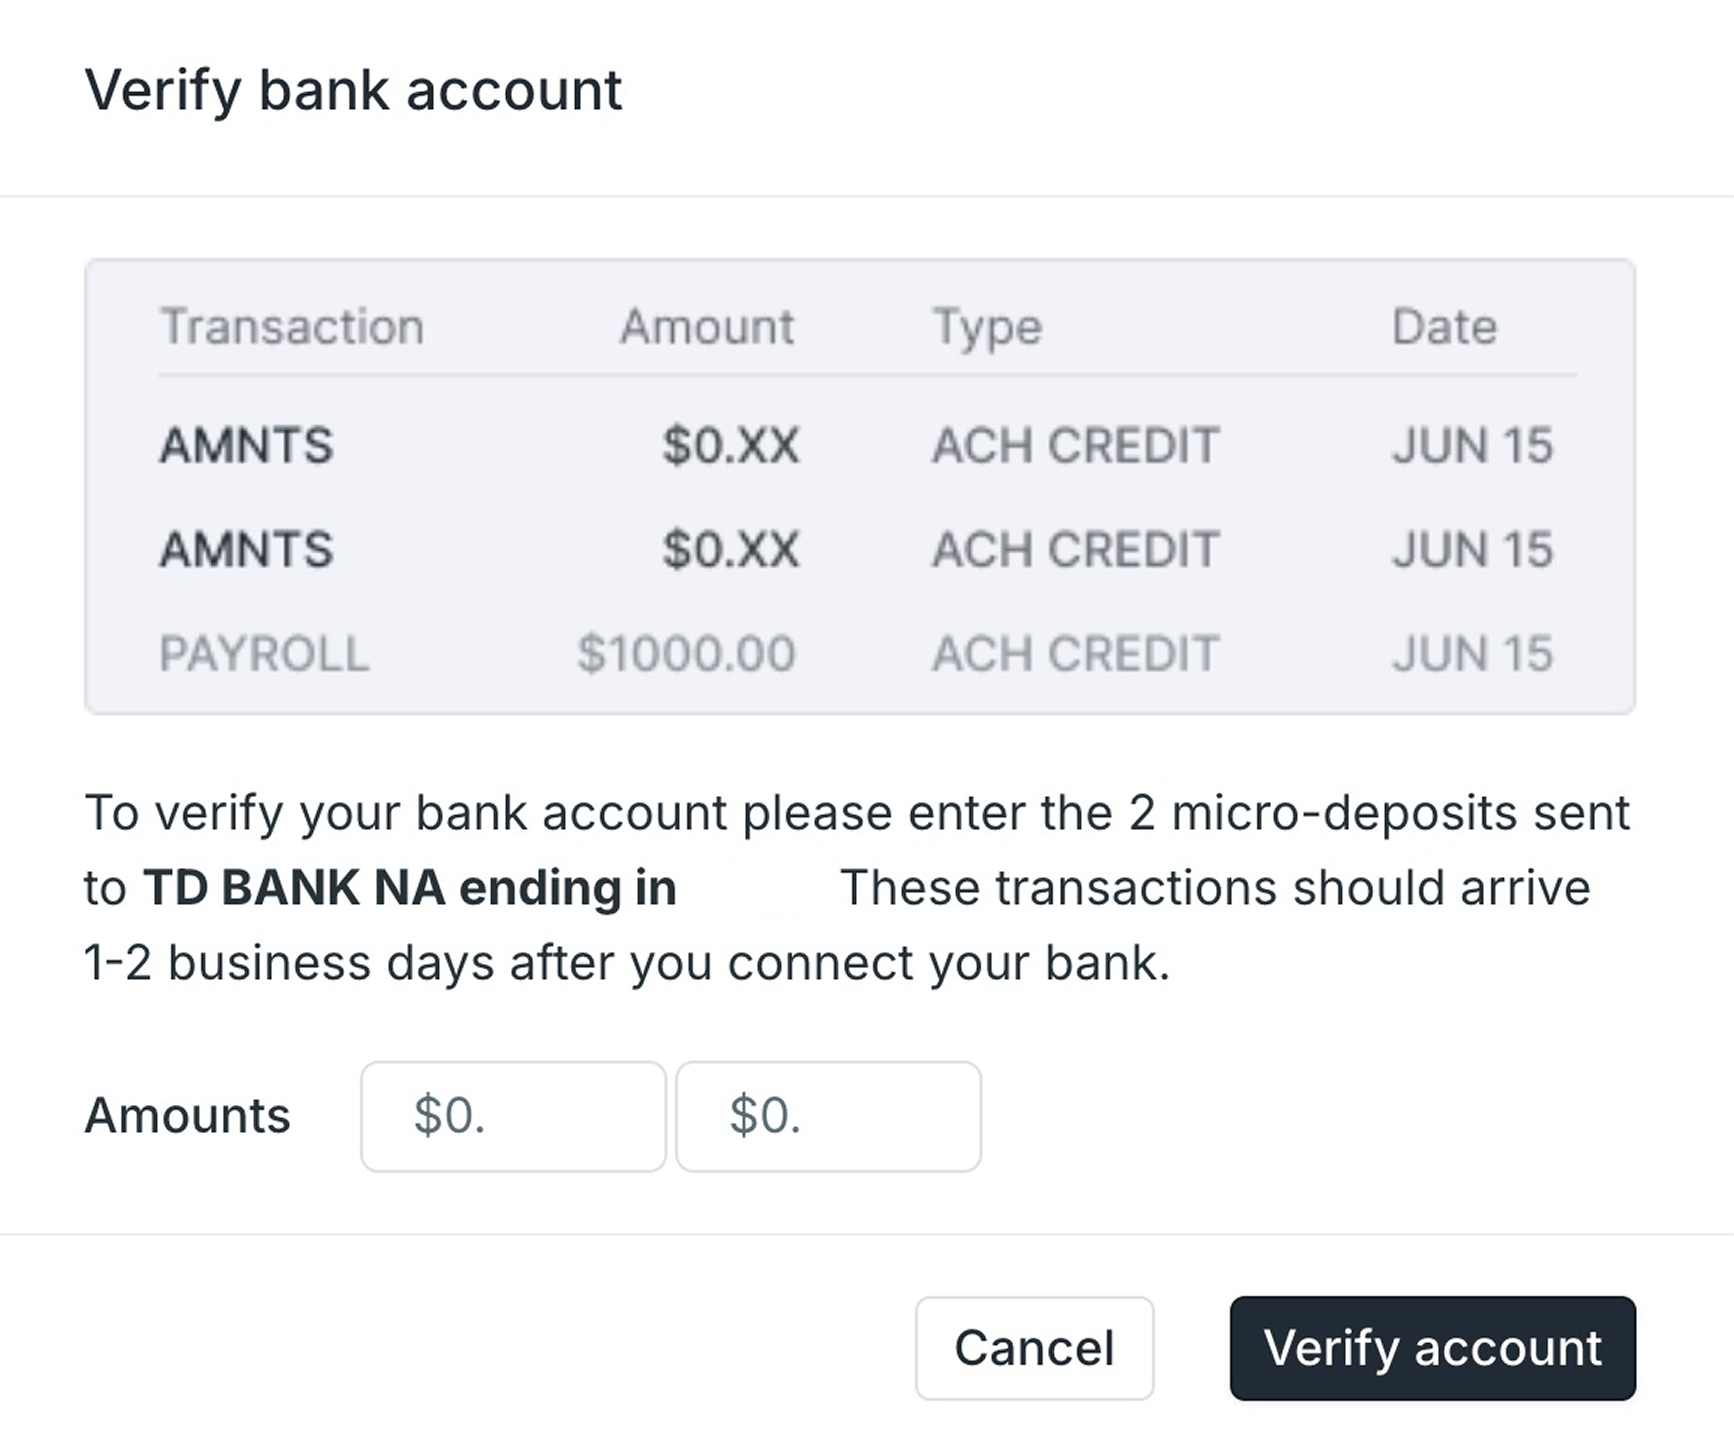 It is important that your clients are aware that a third transaction will appear as a withdrawal for the total amount of the microdeposits. For example, the client would receive 2 deposits and enter $0.05 and $0.03 in the amounts inputs of the Verify account pop-up. They do not need to enter the negative (withdrawal) amount of \$0.08.
Clients will have a maximum of 3 attempts for this verification. If your client exceeds the maximum number of attempts, please contact support.
It is important that your clients are aware that a third transaction will appear as a withdrawal for the total amount of the microdeposits. For example, the client would receive 2 deposits and enter $0.05 and $0.03 in the amounts inputs of the Verify account pop-up. They do not need to enter the negative (withdrawal) amount of \$0.08.
Clients will have a maximum of 3 attempts for this verification. If your client exceeds the maximum number of attempts, please contact support.